


Please sign in so that we can notify you about a reply
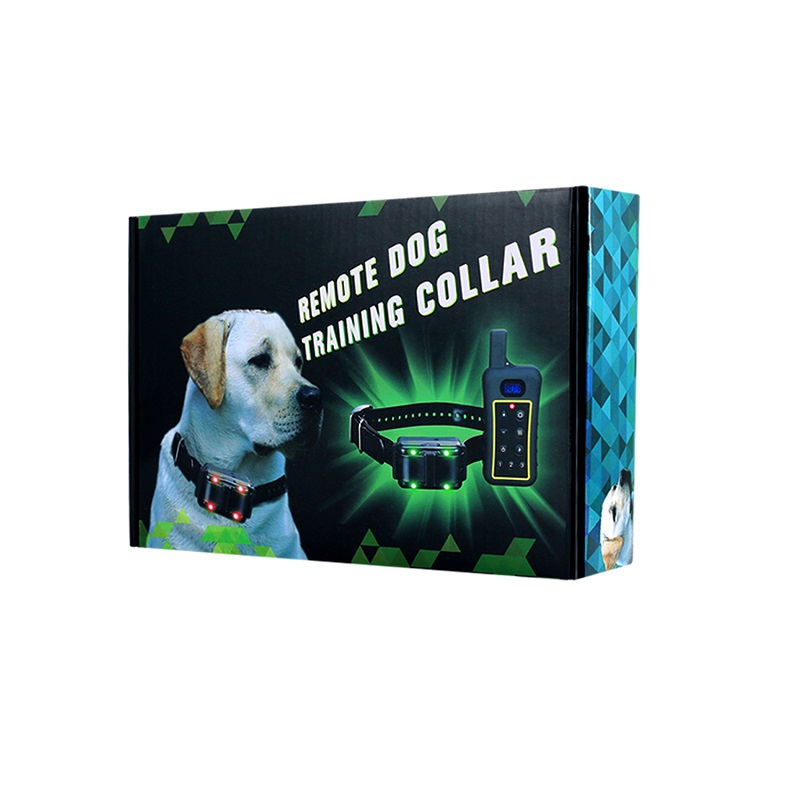
PTS1200 Remote 3/4 Mile Electronic Dog Training with Auto Anti Barking Collar
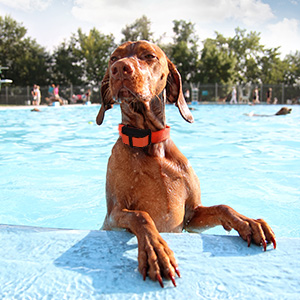
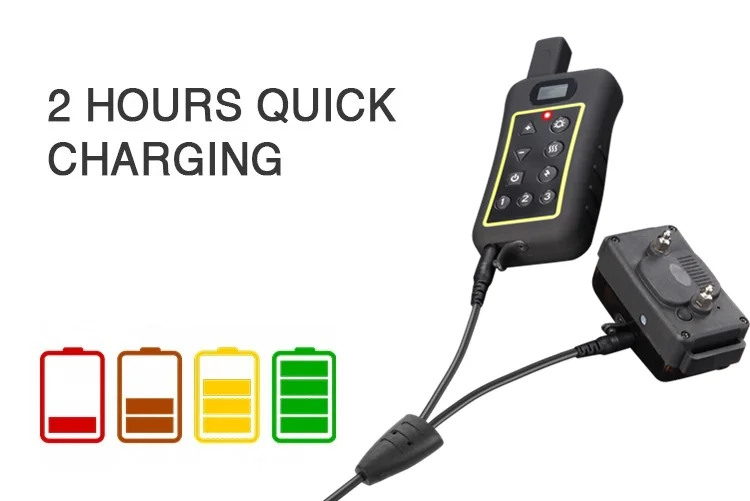
The PTS1200 Dog Training Electronic Collar lets you stretch obedience training and recreational opportunities with your active dog. At home, in the yard, or out at the park, even wild, you're in control all the way out to 3/4 miles (1200 meters). It is not only compact, but also has features typically found on more expensive field models including a long-life rechargeable battery, ten levels of static stimulation, easily accessible vibration and tone stimulation options, and the system is waterproof and submersible to 2 meters. so you can concentrate on what's most important: your dog.
More: The receiver collar can use for Anti bark collar.
Specification
| REMOTE RANGE | Up to 3/4 Miles (1200m) |
| STIMULATION RANGES | 10 levels of static stimulation, (8 seconds safe static shock protection) 10 levels of vibration “Beep” sound activated with a separate button. |
| AUTO ANTI BARK | Yes, Can detec dog barking sound |
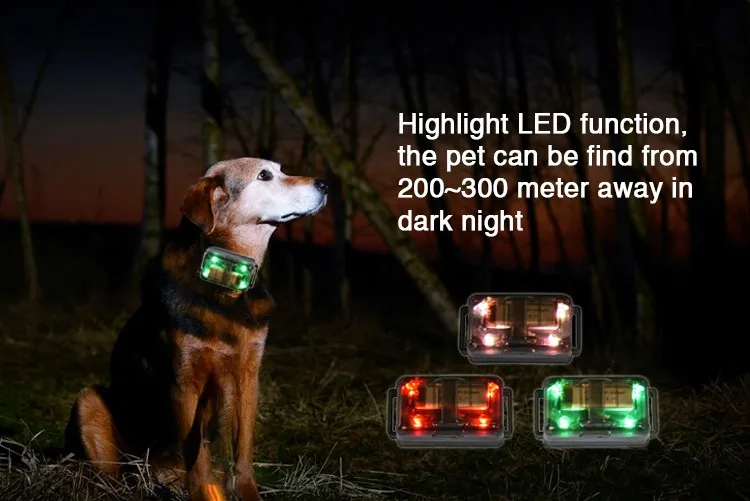
| HIGH LIGHT LED | Can find pet from 200~300 meters away at night |
| EXPANDABLE SYSTEM | 3 dogs training with 1 Remote Transmitter |
| WATERPROOF | Trsansmitter: IP6 ; Receiver: IP7 ,dog can swim freely |
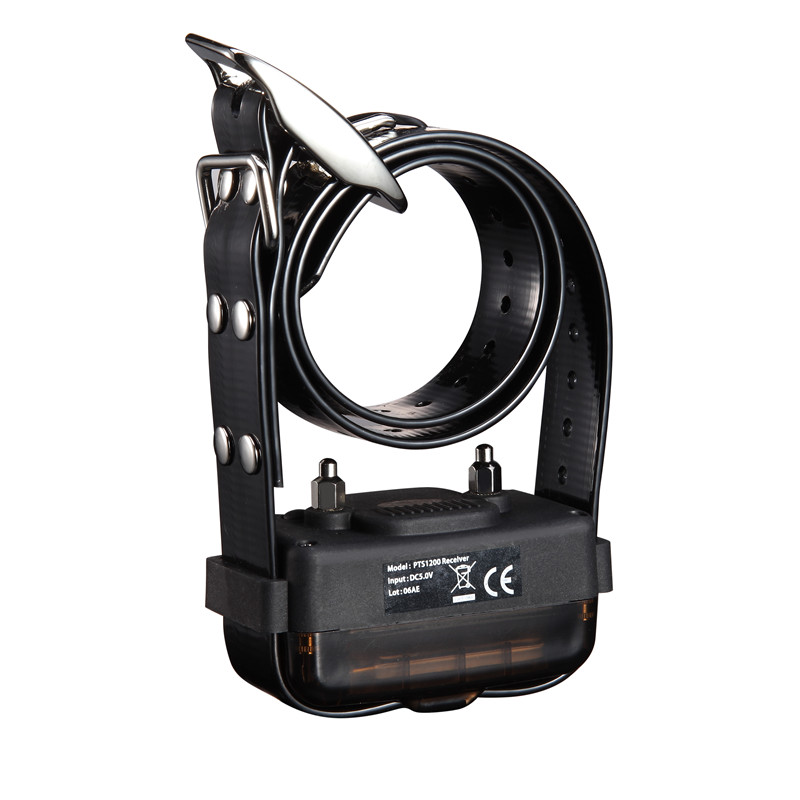
| DOG SIZE | Don't use the collar on a dog that is under 10 pounds or months of old 75cm Adjustable TPU strap |
| BATTERIES | Rechargeable & Replaceable lithium-ion batteries for Transmitter and Receiver |
| LOW BATTERY INDICATOR | YES |
| PRODUCT DIMENSIONS | Receiver without strap - 7.5 X 4.1 X 4.1cm Remote Transmitter - 13.45 X 5.5 X 2.9cm |
| WARRANTY | 2 YEARS |
Product Description
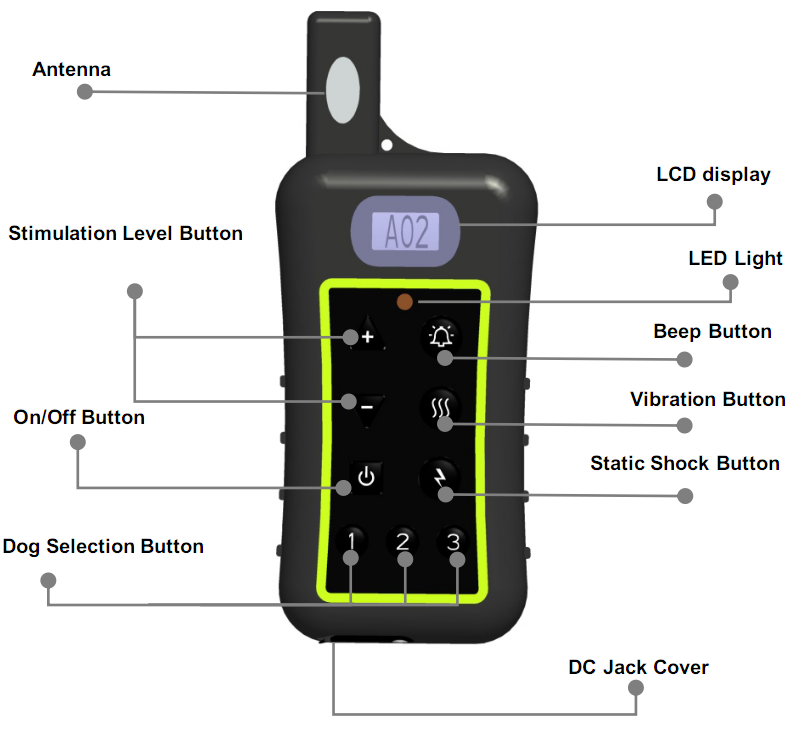
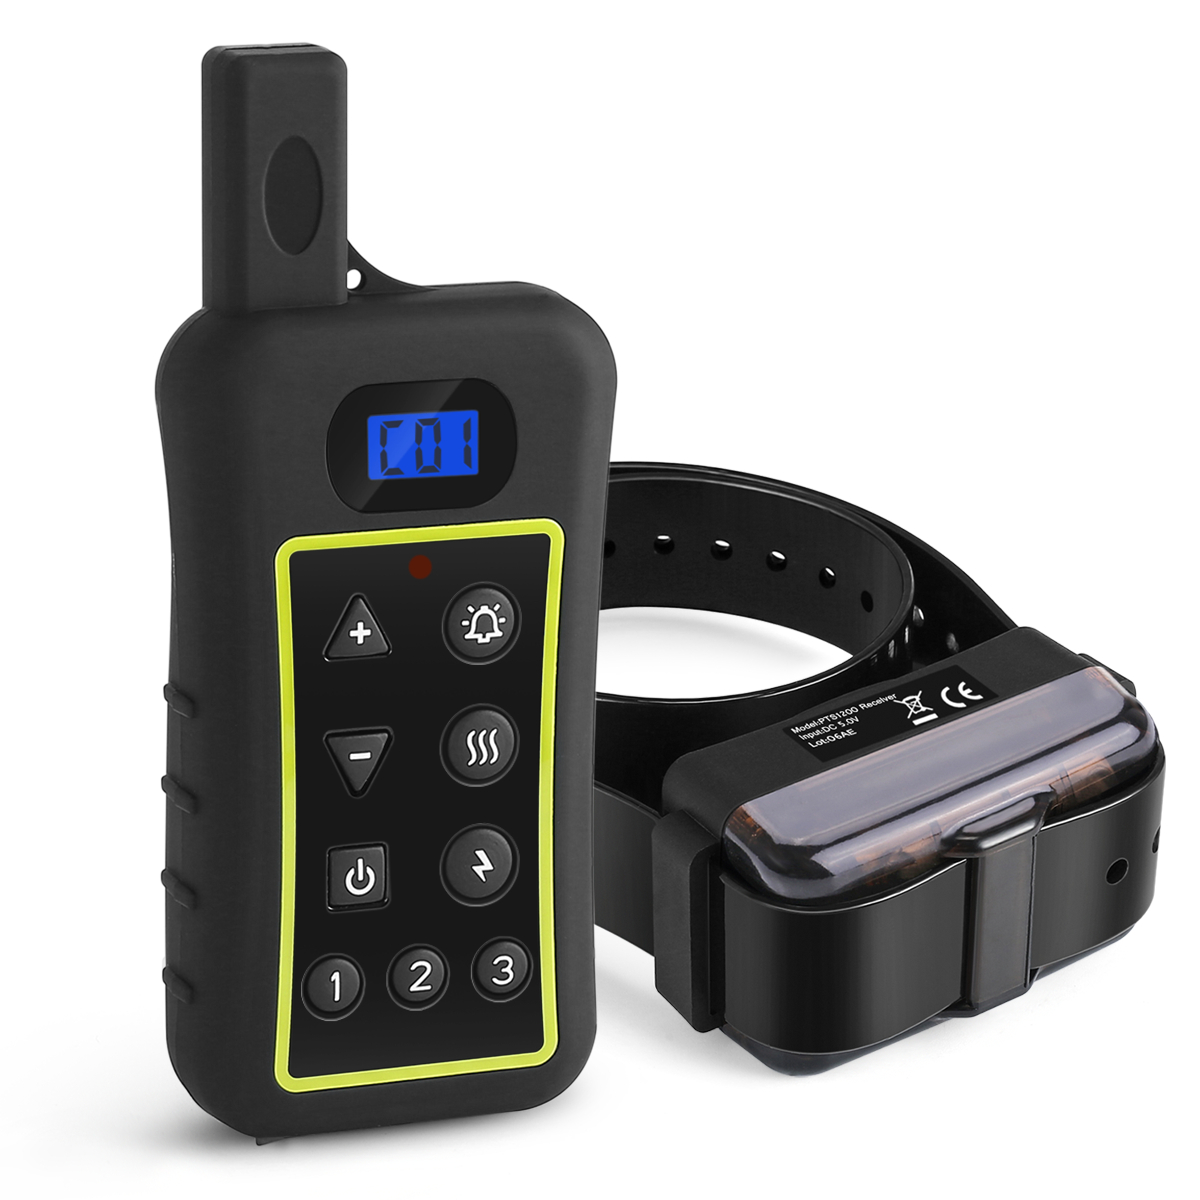
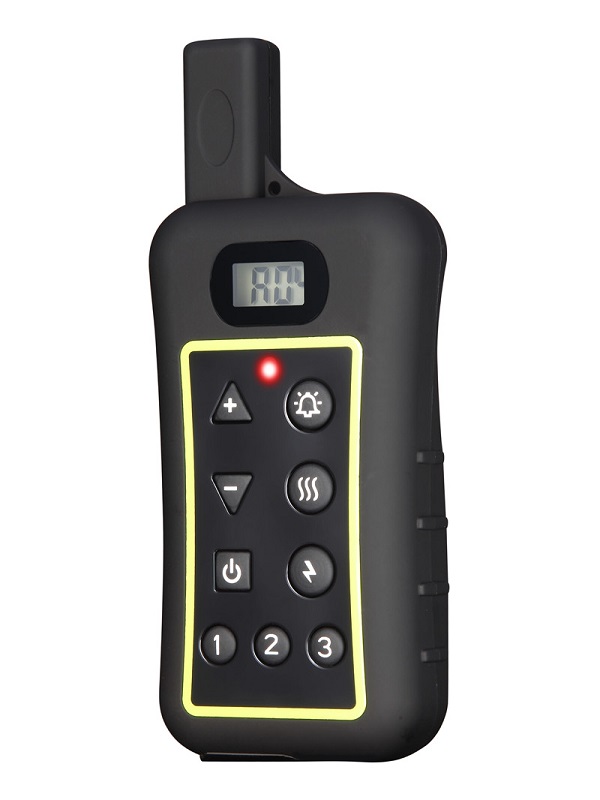
REMOTER
1> LCD digital display for 10 shock & vibration levels and dog ID
2> Two buttons "+" and "-" allow you to set your shock and vibration intensity
3> Easy to operation with rubber button "Tone" "Vibration" "shock"
4> Dog Selection Button 1=A,2=B,3=C allow you to select your dog, LCD Display will show:1 Botton=AXX=Dog 1,
2 Botton=BXX=Dog 2,
3 Botton=CXX=Dog 3,
“XX” = The shock & vibration level.
5> Holding ON/OFF Button 4 seconds to switch of power
6> LED light will flash when the battery is lower on power

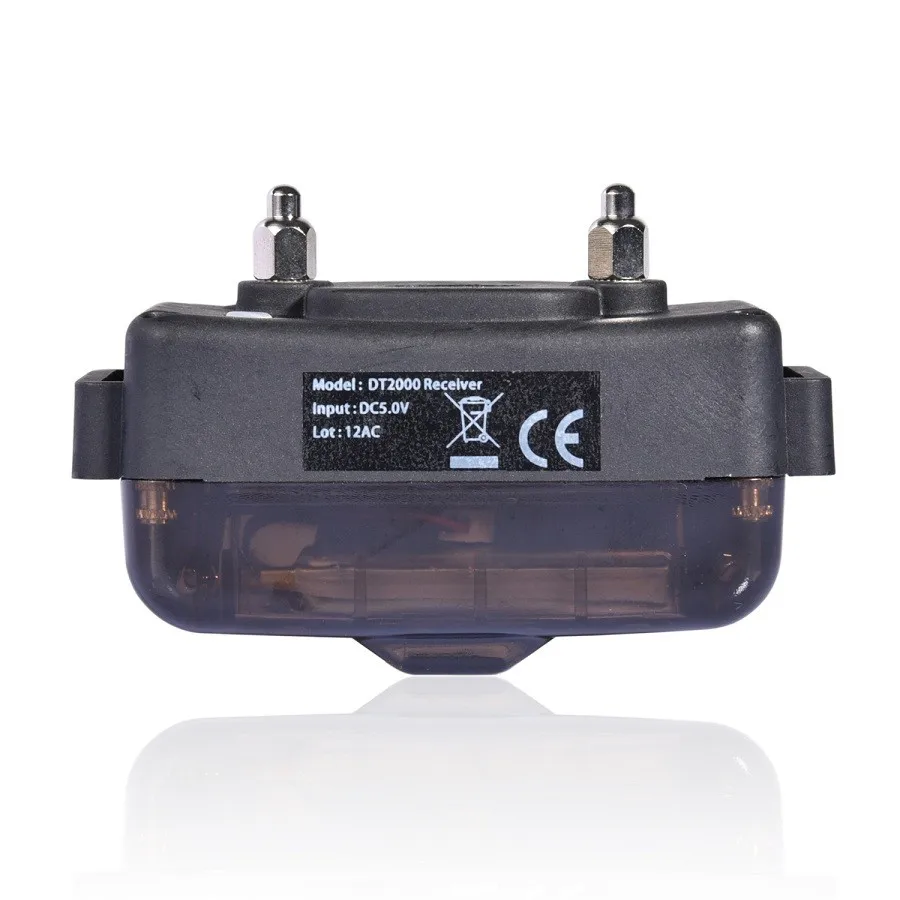
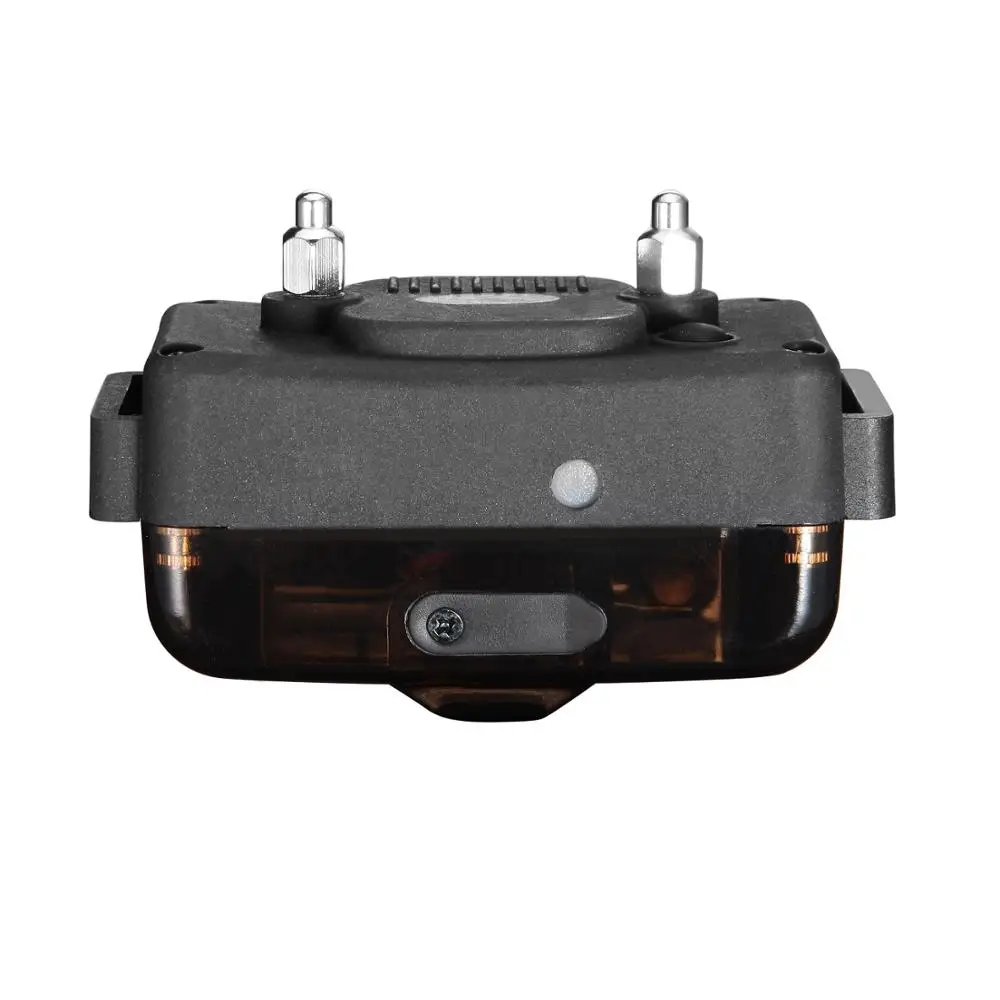
RECEIVER COLLAR
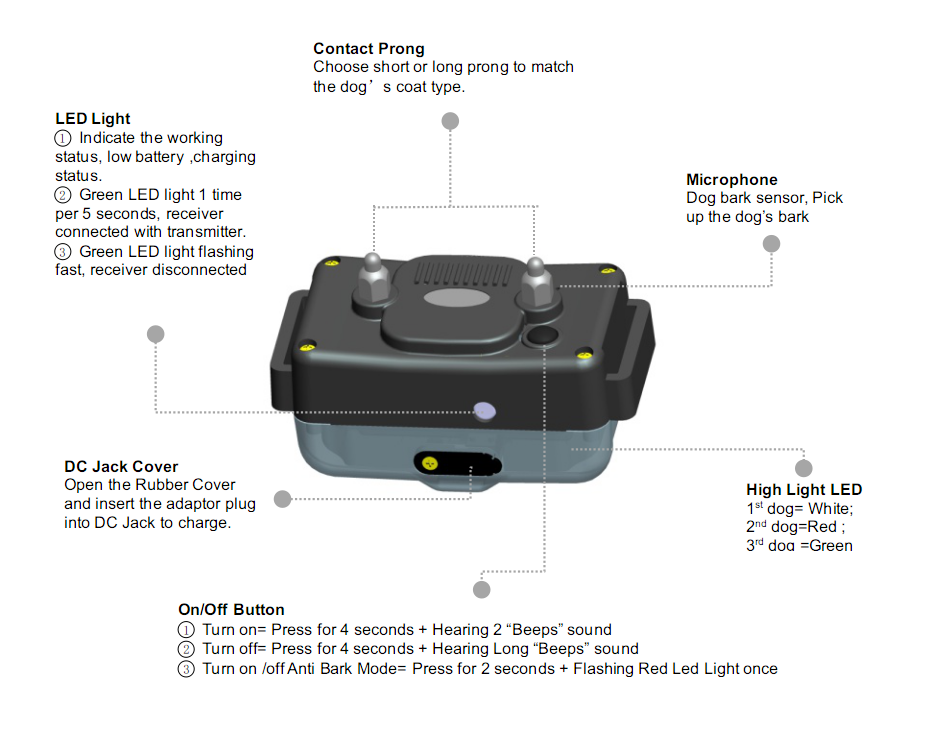
LED Light
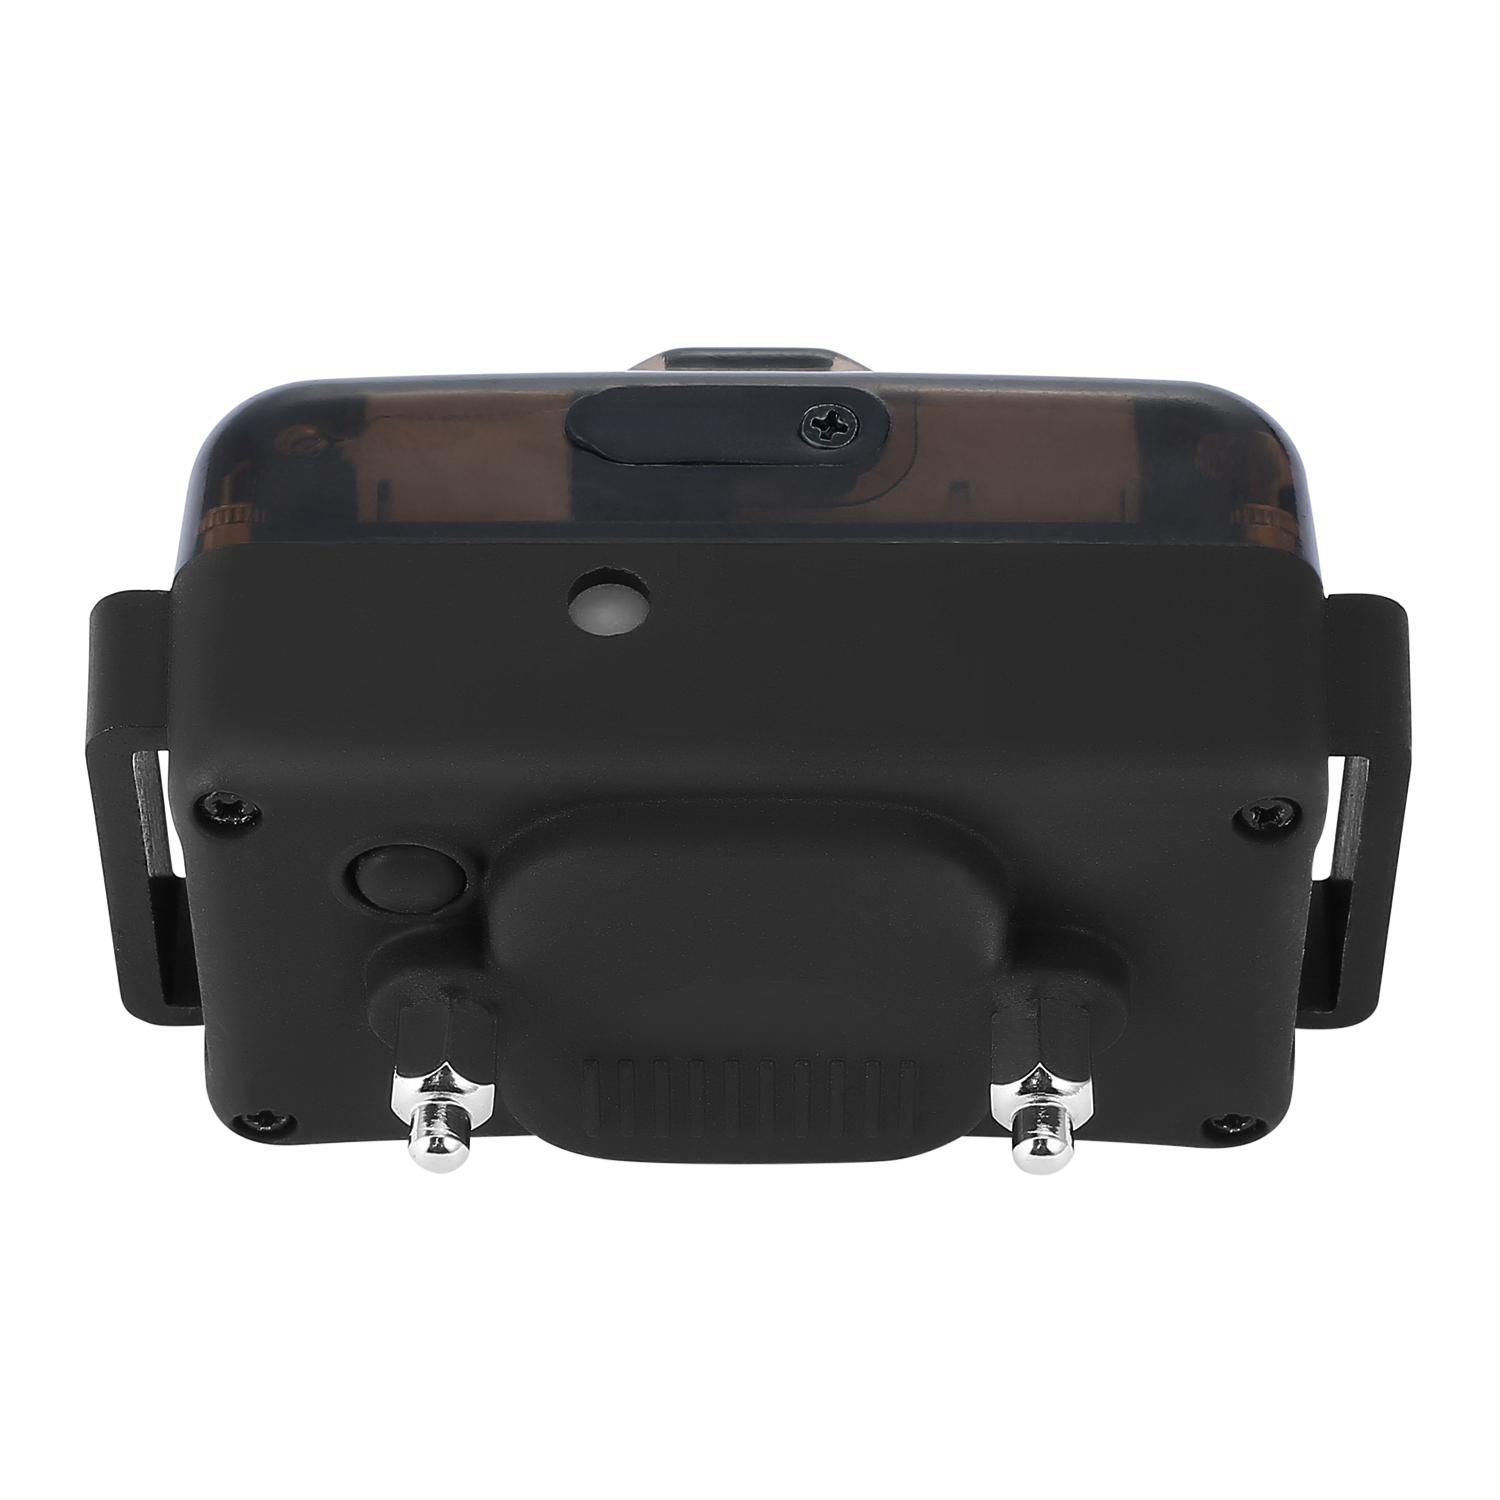
This indicates the working status, Low battery, and Charging statusContact Prong
Choose the short or long prong to match your dog’s coat type
DC Jack Cover
To charge, open the rubber cover and insert the adaptor plug into DC Jack.
High Light LED
For the 1stdog , the high light LED is White; For the 2nd dog ,the high light LED is Red ;
For the 3rd dog ,the high light LED is Green;
On/Off Button
Press and hold on 4 seconds to turn the collar on.
2 confirming tones will sound and the collar green LED light will flash 1 time per 5 seconds if connected. The LED will flash fast if disconnected. Press and hold on 4 seconds to turn the collar off. 1 long tone will sound and the green LED light will stop flashing and turn off.
Turn the collar off when not in use to conserve battery.
Turn on the anti bark function.
Press and hold on 2 seconds when receive collar is on , the Red LED light on then release at once .The anti bark function is on, the remote function is off. The green LED will flash 2 times of 5 seconds. Press and hold on 2 seconds again, the Red LED light on then release at once .The anti bark function is of f, the remote function is on . The green LED will flash 1 time of 5 seconds.
Dog Swimming Freely Safe
Allows dogs to swim with Collars up to 6 Ft Depth

Waterproof IPX 7USING HIGH QUALITY RECHARGEABLE AND WATERPROOF IPX7 WIRELESS COLLARS
AUTO ANTI BARKING
Your remote trainer has anti bark function. Please follow the below steps to turn on the Anti-bark mode.
Step 1: Choose the proper shock level for anti bark
a. Press the "➕ " or "➖" buttons to select a suitable shock level.
b. Then press "⚡" button and confirm the receiving collar receives the signal from Transmitter and emits at least one shock. The receiving collar will keep this shocking level for anti-bark when you turn on the anti-bark mode at once.
c. If you want to change the anti-bark shock level. Please repeat the above 2 steps to set a new shock level.
d. If you don’t set the anti-bark level when you turn on the anti-bark mode,the shock level will be the same as the final emitting static shock of the receiving collar. The vibration is no relationship with the anti-bark shock level.
Step 2: Turn the anti-bark mode on a. Hold and press the On/Off button of receive collar for more than 2 seconds. When the Red light is on then release it at once. b. The green Led light of the receiver will flash 2 times in 5 seconds. The anti-bark mode is on, the remote control function is off. The Transmitter can not control the receiver under anti-bark mode
Step 3: Turn the anti-bark mode off a. Hold and press the On/Off button of receive collar again for more than 2 seconds. When the red light is on then release it at once. b. The green Led light of the receiver will flash 1 time for 5 seconds. The anti-bark mode is off, the remote control function is on.

REMOTE TRAINING MODES
① Range in the open fields up to 1200 meters.
②Train up to 3 dogs from the same transmitter. ③10 levels each of static shock.
④10 levels of vibration
⑤“Beep” sound activated with a separate button.
⑥Two buttons “+” and “-” allow you to set your intensity
⑦Dog selection button allows you to select your dog.⑧LCD digital display for 10 shock & vibration levels & dog ID⑨Memorize shock level in the transmitter for different dogs.
⑩Strong TPU Collar Strap.
⑾LED low power indication, the red light will flash when the battery level is low. ⑿Full functional multi-dog training system.
⒀Around 8 seconds of safe static shock protection.
If you have 3 dogs need training, How to connect 3 receiver collars with 1 remote transmitter?
Connected a Receiver Collar
NOTE: Turn On the transmitter - Press the on/off button 4 seconds
Turn On the Receiver what you want to connect - Press the on/off button 4 seconds
Step 1:
a. Press and hold the " 1 " and " Beep "at the same time until the digital numbers on the LCD display starts counting up, The same time you will hear 5 "beeps" and the High light led flashing slowly.
1=A=White
2=B=Red
3=C=Green
b. Release the button, then connected finished. You can use the remote training collar

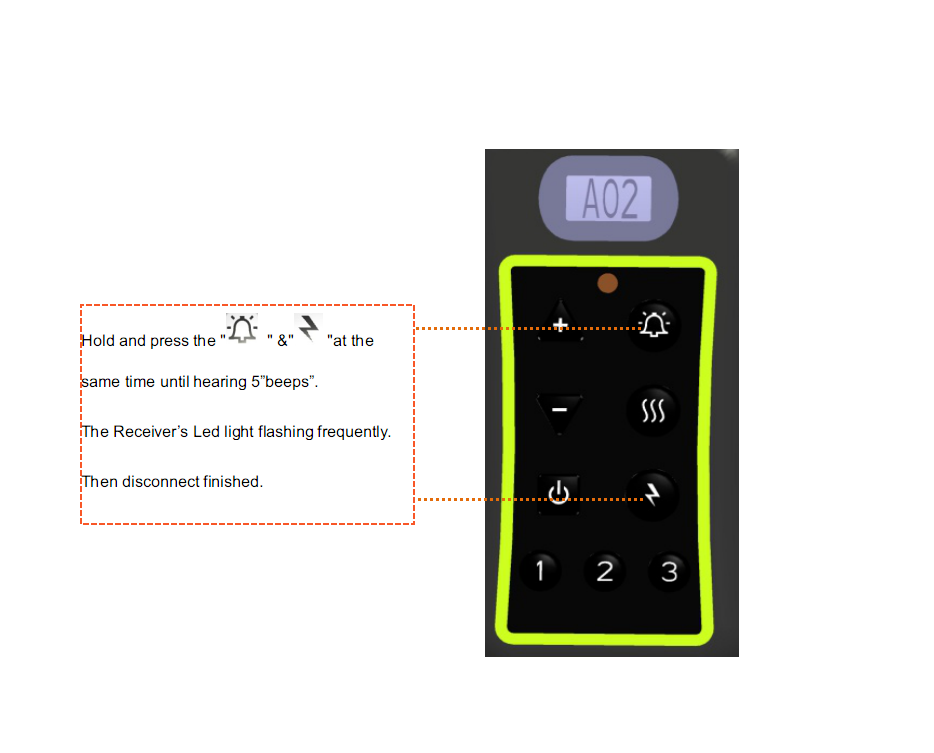
Disconnect a Receiver Collar
NOTE:Turn On the transmitter - Press on/off button for 4 seconds Turn On the Receiver what you want to connect - Press on/off button for 4 seconds
Step 1: a. Press and hold on the " Beep" and " ⚡ " button at the same time until hearing 5 "beeps",
b. Release the button, then disconnect
Durable TUP Colorful Strap
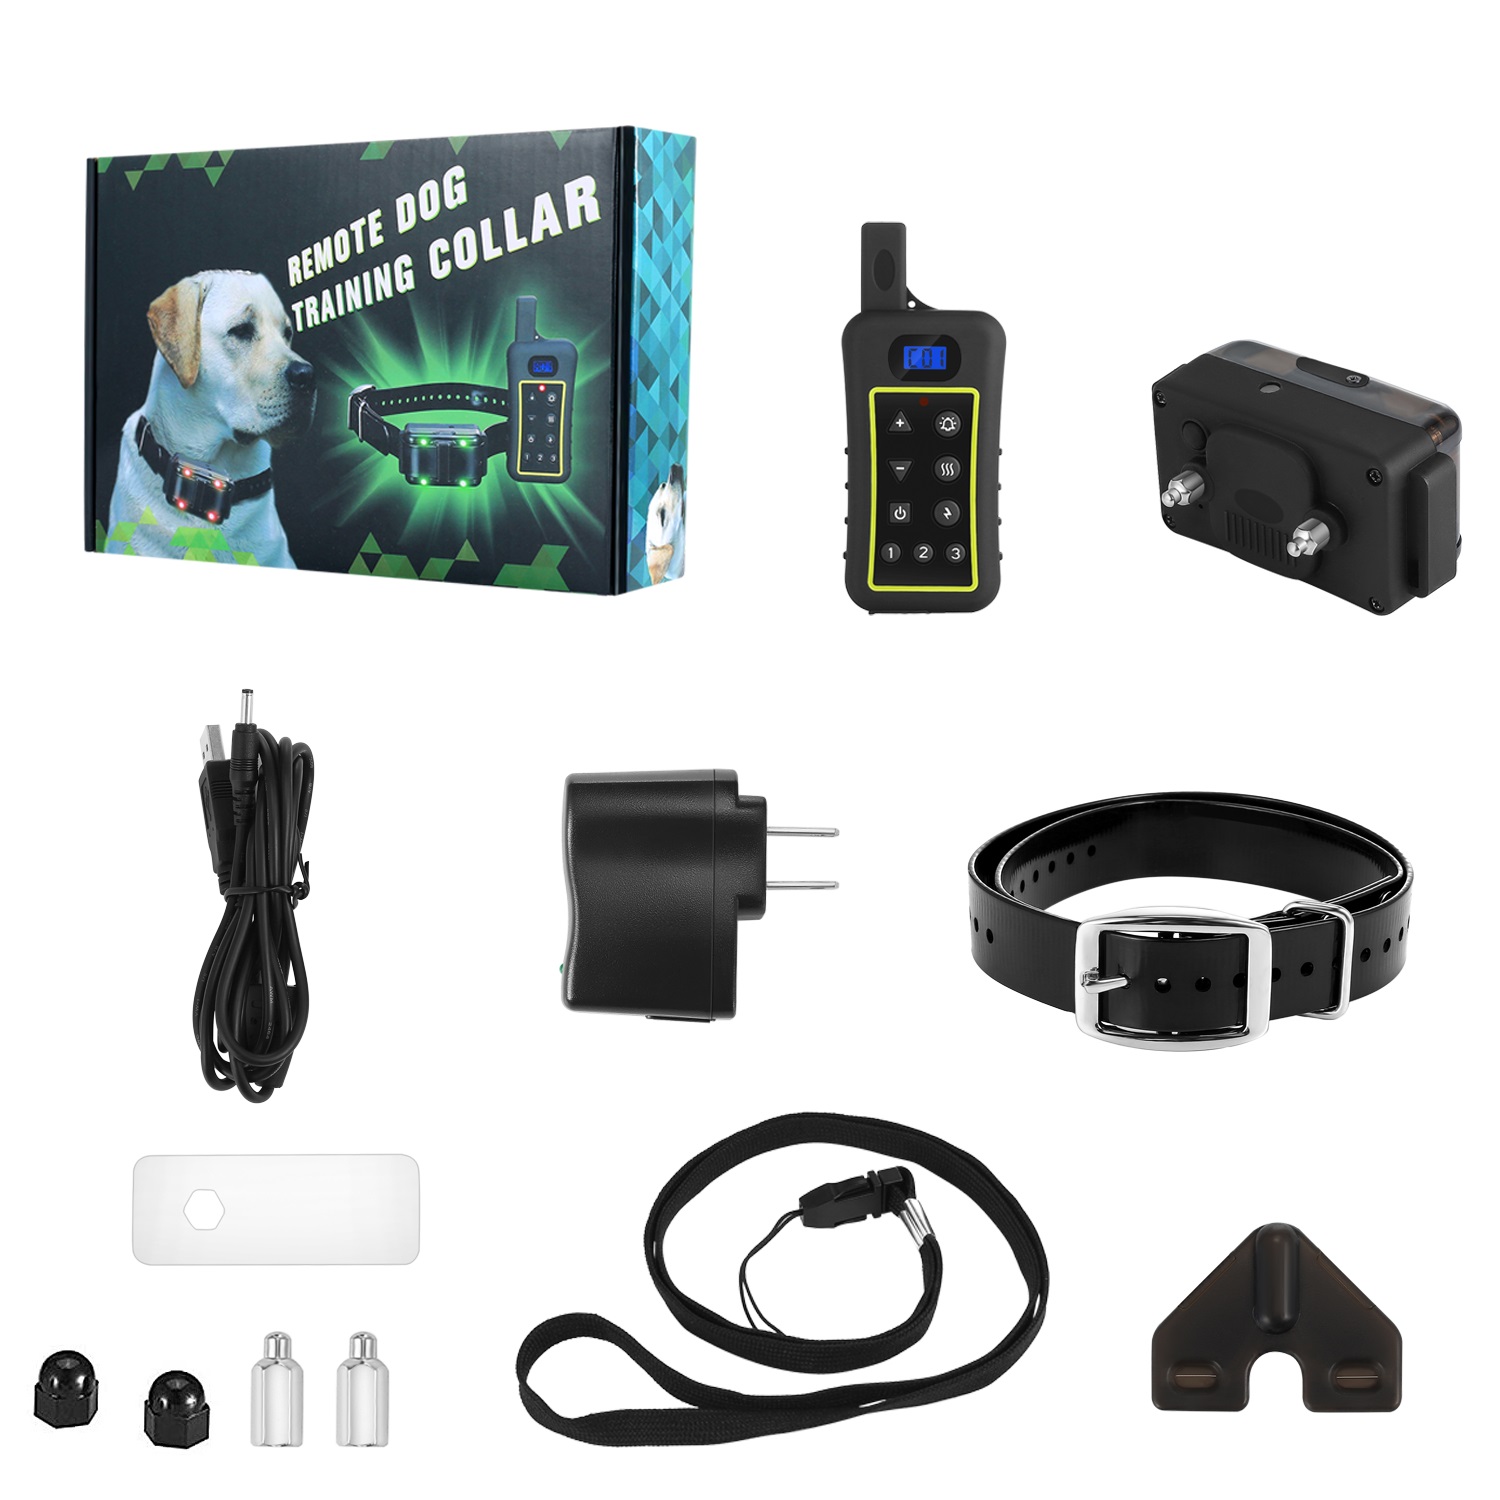
CONTENTS
1*Transmitter1*Receive Collar
1*5V 1000mA DC Adaptor
1*75CM Adjustable TPU Strap
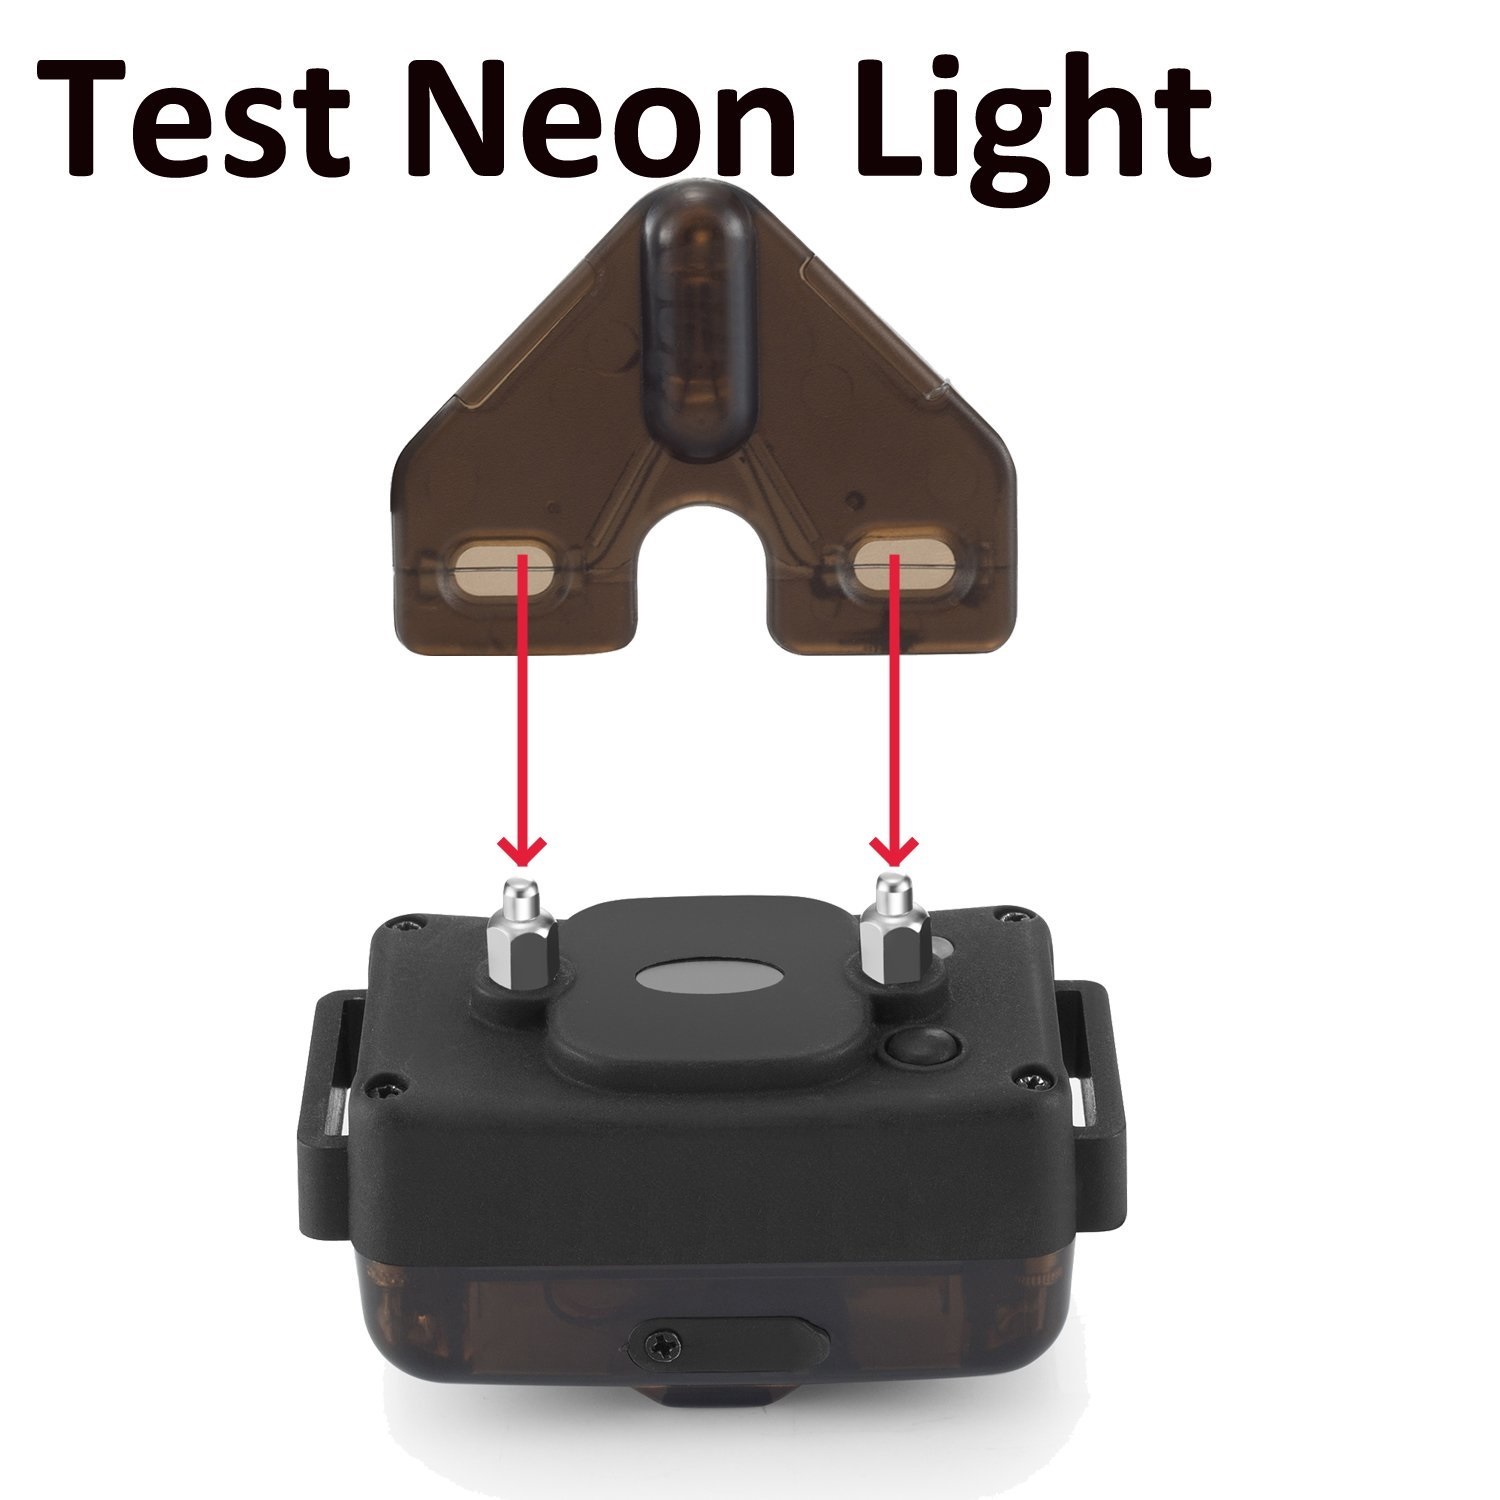
1*Test Lighter
1*2 Pins USB Cable
1*Lanyard for Transmitter
1*Manual
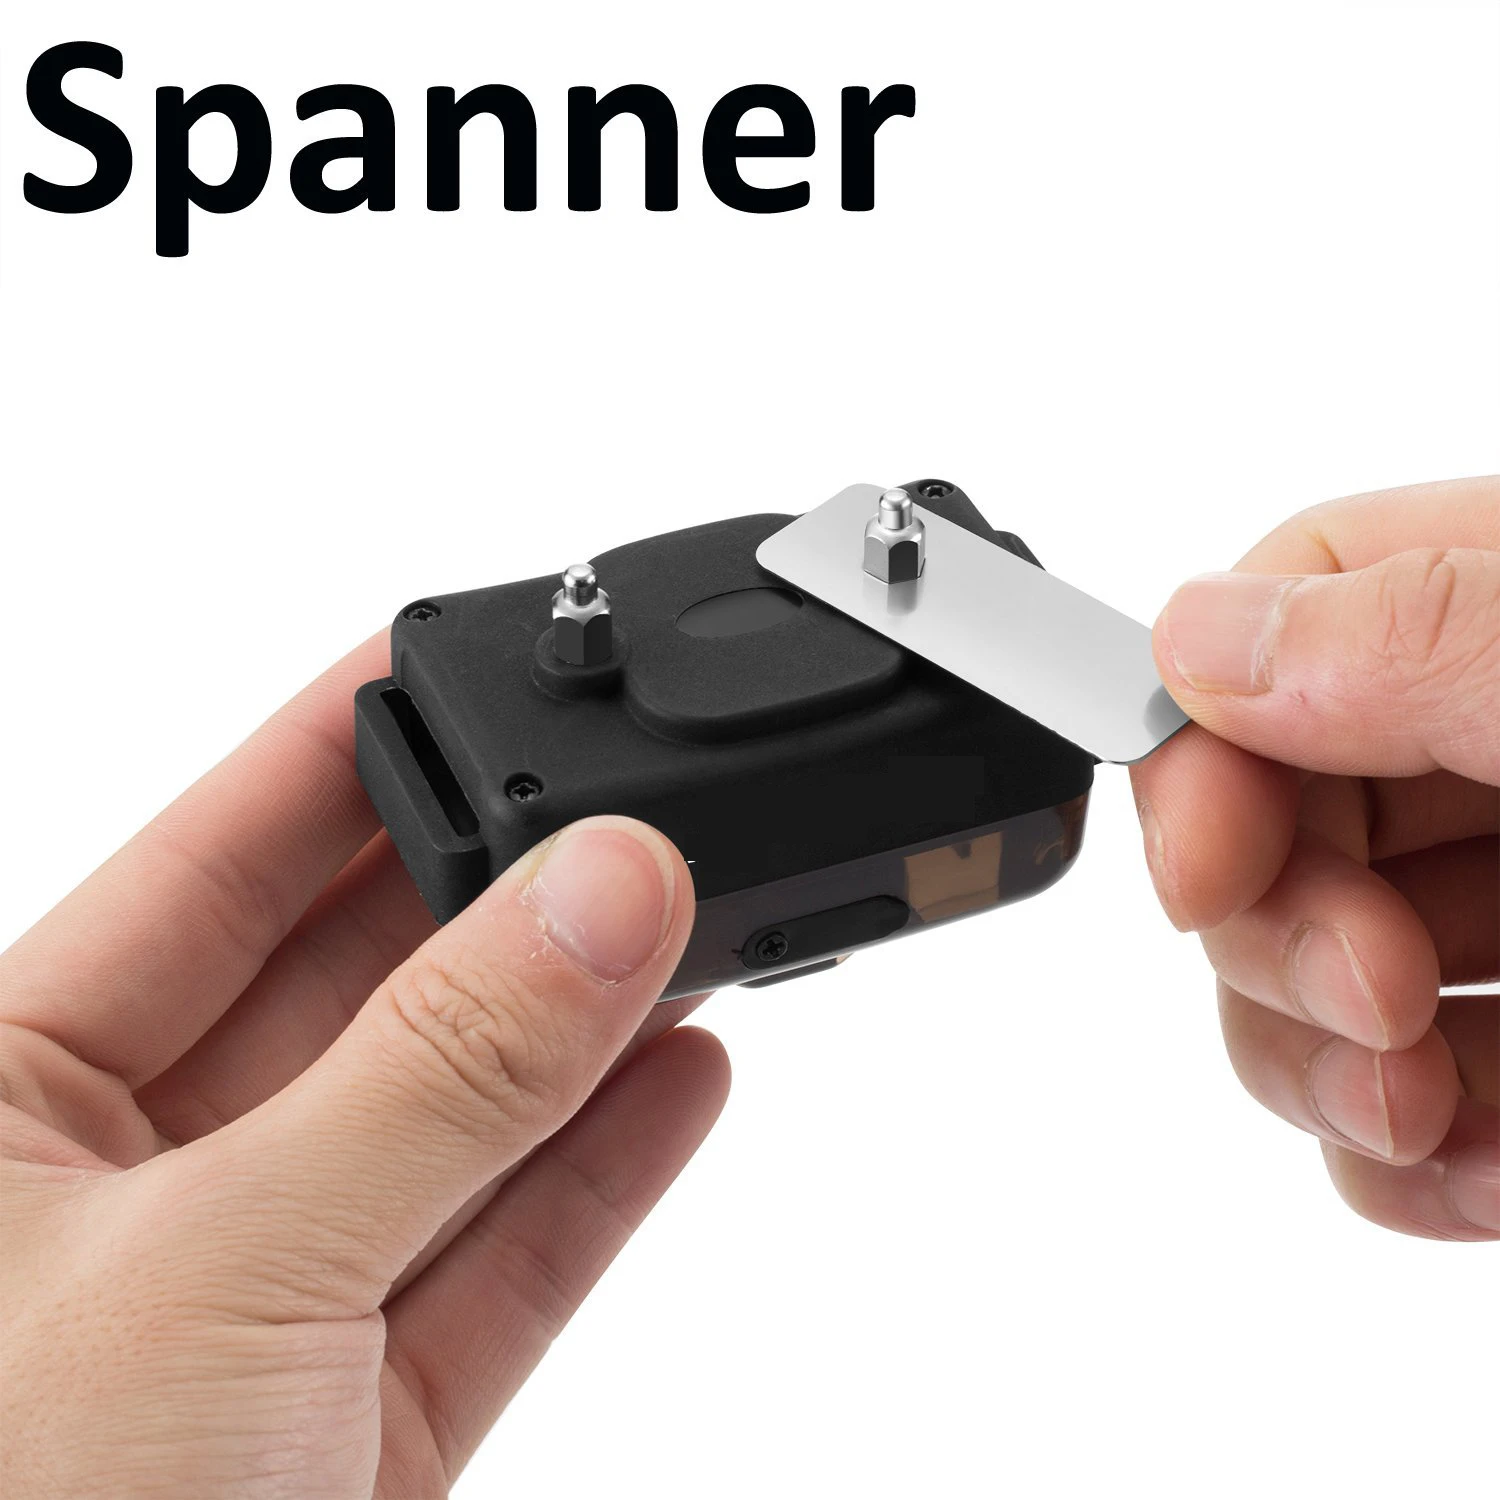
2*Long Prongs
2*Short Prongs
2* Plastic Prongs
1*Spanner for changing prong
Paper Box
Our standard box, Its the neutral paper box.
QTY/CTN SIZE: 46X31X29CM(20PCS)

Tool Box
Add price for the tool box, can fill 3 collars together. And add one more car charge.QTY/CTN SIZE: 41X69X38CM(10PCS)

STANDARD PACKING DETAILS
BOX SIZE: 21.5X14.5X4.8CM
WEIGHT: 0.5KG/PCS
QTY/CTN SIZE: 46X31X29CM(20PCS)

Customized Service

CONTAINMENT TRAIN FENCE CUSTOMIZE
OEM SERVICE:
1. PACKING BOX CUSTOMIZE,
2. BRAND LOGO ON RECEIVER, COLLAR, FLAGS,
3. FENCE WIRE CUSTOMIZE,
MORE... ... AS REQUEST
OEM/ODM service
1. Professional R&D and design team
2. ID design
3. Function design, layout
4. Custom materials, processing
Main features
Multimedia
Dimensions
No reviews found