


Please sign in so that we can notify you about a reply

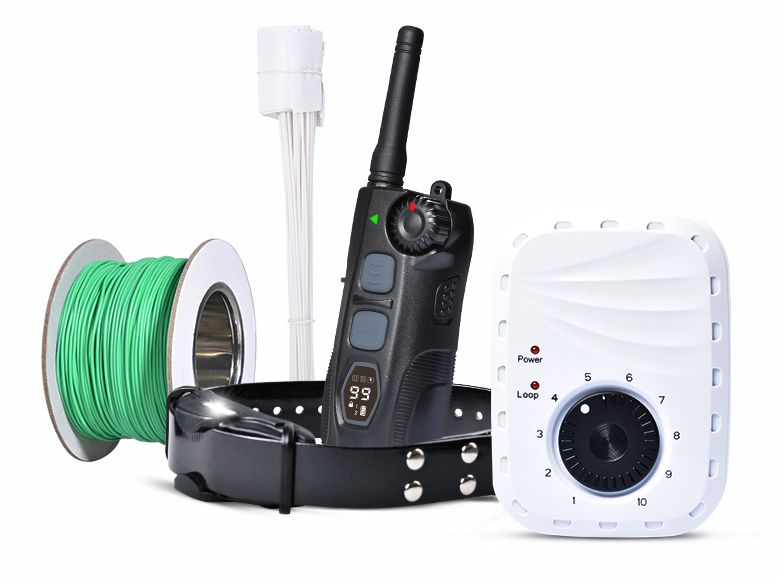
DF213 Electronic Containment Fence with Remote Dog Training Collar
(RECHARGEABLE IN-GROUND FENCE SYSTEM)
Specification
| SPECIAL FEATURES |
Expands up to 25 acres with the purchase of additional Wire & Flag Kits; 492feet (150m) of wire, 50 flags, and 1 Collar; Receivers are included to keep your dog contained in a yard up to 5 acres; Wire-break Transmitter alarm alerts you to possible problems with the Boundary Wire; Built-in lightning protection; |
| REMOTE RANGE | Up to 2000m (1.2miles) |
| STIMULATION TRAINING MODE | 0-99 instantly selectable static stimulation levels(8 seconds safe static shock protection); Vibration and tone options |
| STIMULATION CONTAINMENT MODE | 0-99 levels of static stimulation( adjustable by remoter) Vibration |
| EXPANDABLE SYSTEM TRAINING MODE | 2 dogs training with 1 Remote Transmitter |
| EXPANDABLE SYSTEM CONTAINMENT FENCE MODE | Expands to any number of dogs with the purchase of additional Collar Receivers |
| WATERPROOF | Transmitter: IP6 ; Receiver: IP7 ,dog can swim freely |
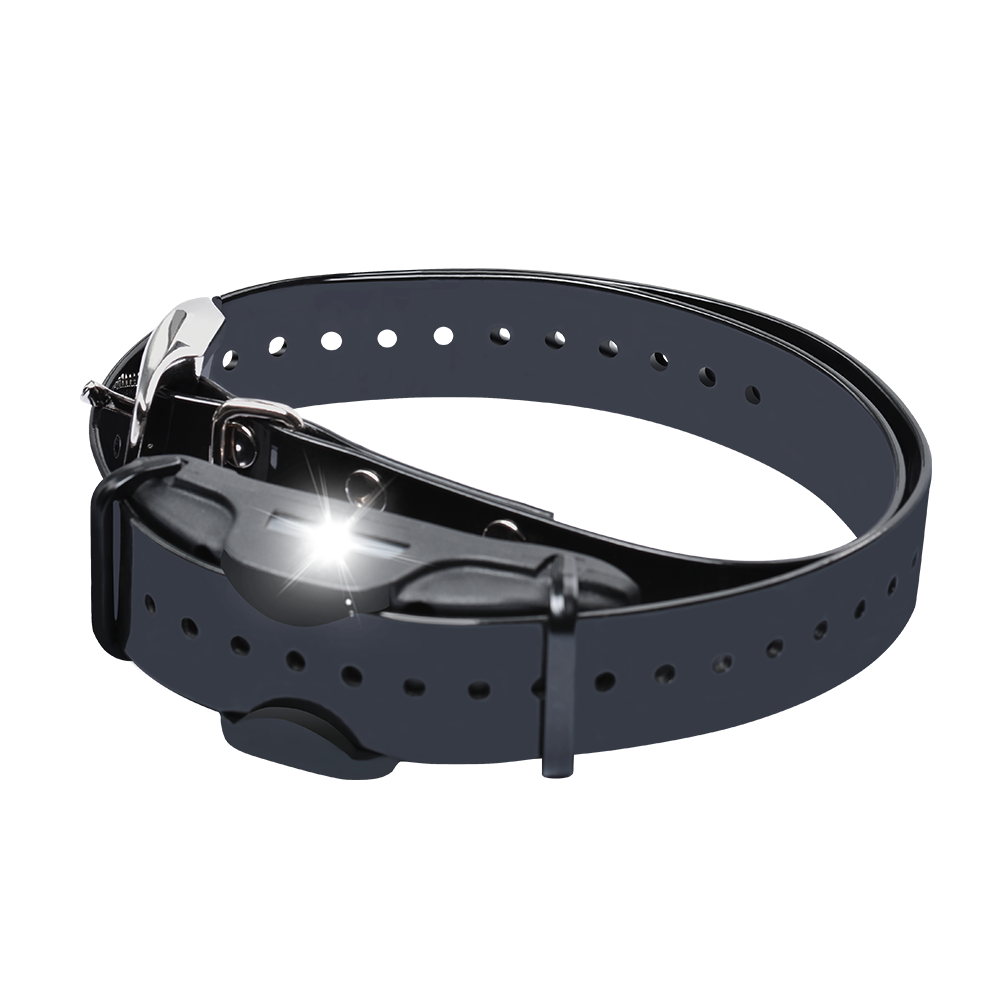
| DOG SIZE | Don't use the collar on a dog that is under 10 pounds or months old; 75cm Adjustable TPU strap |
| BATTERIES | Rechargeable & Replaceable lithium-ion batteries for Transmitter and Receiver |
| LOW BATTERY INDICATOR | YES |
| PRODUCT DIMENSIONS | Remote size 10x4x2.7cm
Receiver collar size 9 x3.5x3 cm Transmitter size 13x9.6x3.8cm |
Product Description

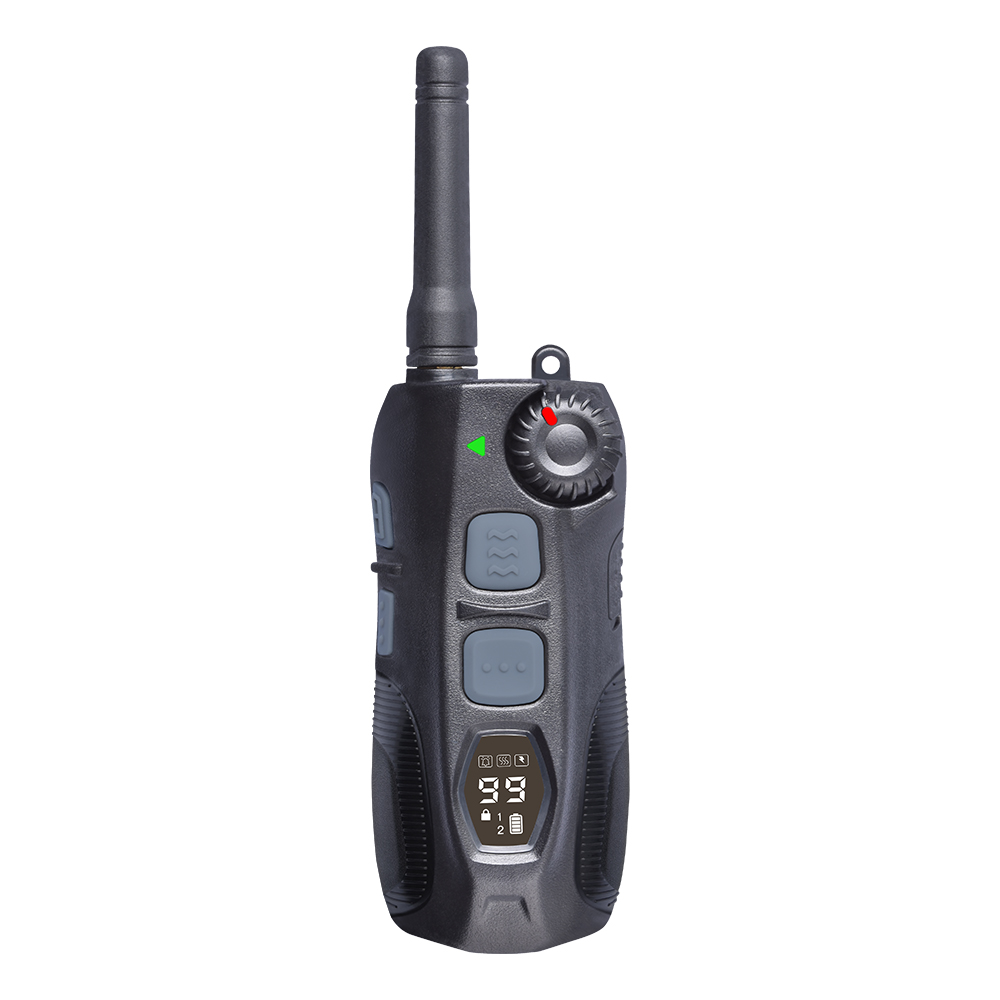
REMOTER
Shock Adjust & Lock Switch:
1 > Rotate the switch to adjust the shock intensity from levels 0 to 99.
2 > Press the switch to lock the shock level, press the switch again to unlock the shock level.
Vibration button:
1 > Vibration stimulation. Press 1 time - vibrate 1 time. 2 > Press and hold on- emit continuous vibration will stop vibrating when you let go of the button. and will stop automatically when you go past 8 seconds of holding the button.
Dog selection button:
1 > Move up to choose the first dog , The LED screen display“1” ; 2 > Move down to choose the second dog, the LED screen display “2”
Beep button:
1>No-stimulation warning beep
Led light:
Indicates the working status and low battery Highlight Led buttons: 1 > Press button 1 time , the receive collar will highlight flash 1 time per 3 seconds continuously;
1 > Press button again , The highlight LED is on ; then Press button again, the highlight LED is off .
Momentary shock button:
1 > Momentary static shock.
Continuous shock button:
1 >Continuous static shock for about 8 seconds.
LED display :
Display the shock ,warning beep or vibration mode ; display shock level ,
lock or unlock shock level ,dog ID ,battery Level
On/Off button:
This is the power switch; hold this button for 1 seconds to switch on power,
then LED display is on. If you want to switch off the power, hold this button for 1 seconds to switch off power.
You may change Dog ID by move the Dog Selection Button.
DC Jack:
Charging the remoter.
The transmitter has the memory functions to save the suitable shock for different dogs. 99 levels of shock stimulation, 1 level of vibration stimulation. 1 tone.
NOTE: The red LED light will flash when the battery is low on power. Recharge the battery at once.

RECEIVER COLLAR
LED Light
This indicates the working status, Low battery, and Charging status
Contact Prong
Choose the short or long prong to match your dog’s coat type
DC Jack Cover
To charge, open the rubber cover and insert the adaptor plug into DC Jack.
On/Off Button
Press and hold on 4 seconds to turn the collar on. 2 confirming tones will sound and the collar green LED light will flash 1 time per 5 seconds if connected. The LED will flash fast if disconnected.
Press and hold on 4 seconds to turn the collar off. 1 long tone will sound and the green LED light will stop flashing and turn off.
Turn the collar off when not in use to conserve battery.
The collar has 2 modes:
Single mode: Fence function only, Green LED light flashes 2 times per 5 seconds
Dual mode:
The fence function and remote function both have, Green LED light flashes 1 time per 5 seconds.
Turn the collar off when not in use to conserve battery
Hold the remoter's button Beep + vibrate to turn off the fence function


PAIR A RECEIVER
Step 1 :
Take the receiver you wish to match and press and hold the “ON/OFF” button. After two “beeps”, the receiver
is powered on and you will notice the green LED flashing frequently. (Note: ever open 2 or more unmatched receivers.)
Step 2 :
Press and hold the “ON/OFF” button on the transmitter until the LED display screen comes on. Release the button,and now the transmitter is powered on.
If you want to match the 1st dog or 2nd dog, please choose it , The LED display “1” or "2"
Step 3 :
Press and hold the Vibration button and Highlight Led button at the same time.until The LED display is “P”. Not to release the two buttons.
Step 4 :
Hold the transmitter close to the unmatched receiver 1 to 2 inches away. After hearing 5 “beeps” sound from
the receiver and you see the green LED flashing slow down to once every 5 seconds, you release the button. It should connect pretty fast.
Step 5 :
Test matched Receiver Press the Vibration button, and Beep button to test the reaction of the receiver collar.
Press the stimulation button to test the receiver by Test Light 1. Insert the contact points into the Test Light.
2. Press a stimulation button on the remote transmitter.
3. The Test Tight will flash.
4. Turn the collar receiver off.
5. Save the Test Light for future testing.
How To switch on/off the Single Mode and Dual mode
Single mode 1)
Press On/off button keep for 2 seconds when receive collar is on, the Red LED light on then release at once. The green LED will flash 2 times of 5 seconds. The fence function is on, the remote function is off. It is Single mode now.
Dual mode 2)
Press On/off button keep for 2 seconds again, the Red LED light on then release at once. The green LED will flash 1 time of 5 seconds. The fence function and remote function are both on. Now it is Dual mode.
Battery operating times can vary and are dependent on usage and estimated as follows: Dual Mode: 75-80 Hours Single Mode 15-20 Days
Hold remoter's button Beep + vibrate to turn off the fence function
DUAL MODES
Dual Trainer and Fence
1) AN EASY COST EFFECTIVE AND SAFE WAY TO TRAIN AND CONTAIN YOUR DOG-
2) Our Dual function electric dog fence and training collar system is a quick cost effective and practical solution allowing you to train your dog to stay in the yard and also train your pet when you are out for a walk! 2 uses with the 1 kit!!
3) OUR COLLARS ARE DESIGNED TO SUIT MOST SMALL, MEDIUM AND LARGE DOGS4)If you Have more than 1 Dog add extra collars, up to 2 collars can be paired to the 1 Remote for Manual training and unlimited collars can be used in fence mode

SINGLE FENCE MODE
1) Beep warning with vibration and 3 levels of static correction for pet boundary awareness training.2) Easy Containment for Dogs
3) Will automatically send an Audible tone/Vibrate warning first as the dog approaches the electric dog fence boundary and then will automatically send a safe static correction and vibration in an auto sequence to safety train and contain your dog.
4) Dogs Quickly learn to stay away or cross these boundaries.


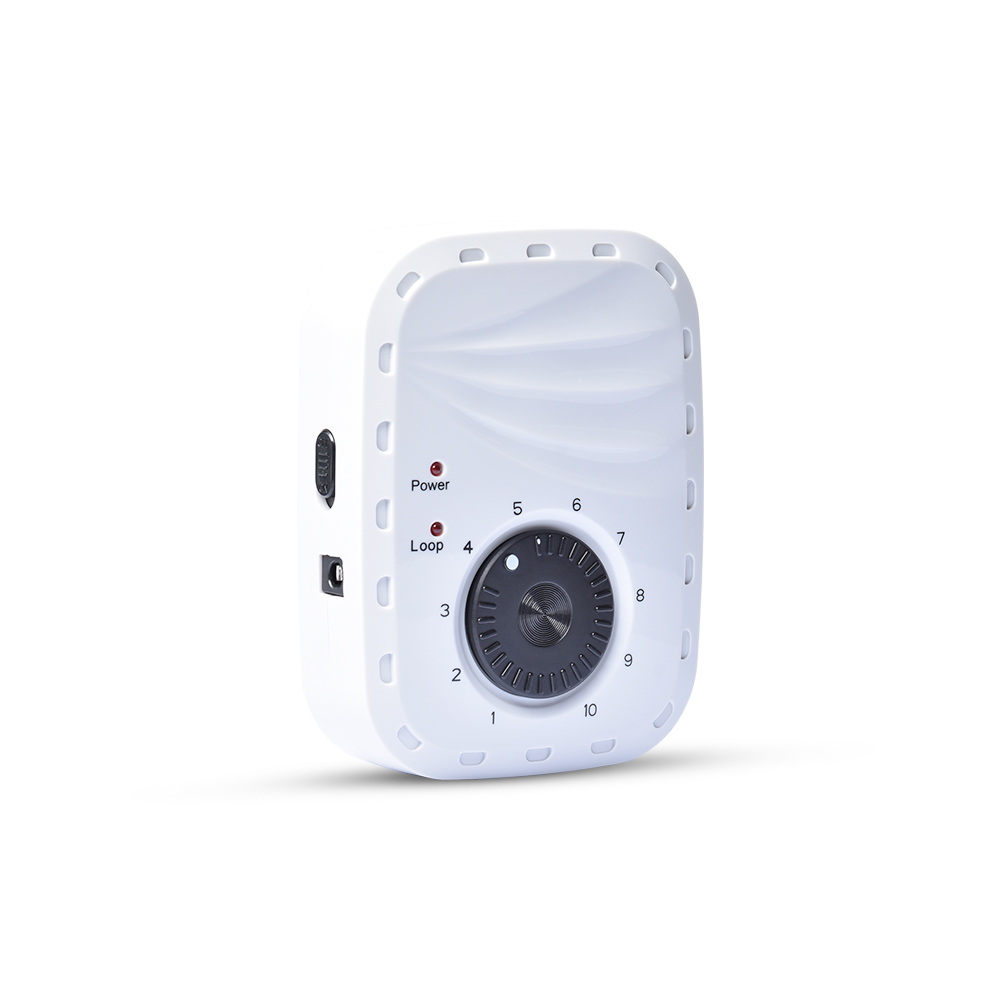
TRANSMITTER
Boundary Width Control Switch: This knob allows you to adjust the Boundary Width, which is the combination of Warning Zone and Static Correction Zone.
Boundary Wire Terminals:
These terminals are where the Boundary Wire connect to the Fence Transmitter in order to form a continuous loop, designating the pet area.
Power Light:
This light indicates if the system is on or off. If the light is glowing, the system is on and functioning.
Loop Indicator Light:
This light indicates whether or not the Boundary Wire is forming a complete loop enabling the signal to be transmitted. If the light is glowing, a continuous loop has been formed.
Power Jack:
This is the connection point for your Power Adaptor. The Transmitter is powered by 18V DC Power.
Power button:
Power on or off the Fence transmitter
If you have small perimeter, this may cause inference and cause collars to beep/vibrate randomly within the perimeter. In that case, connect the resistor unit found in your pack to one end of the Wire Connection Terminal and the cable to another end of the resistor as per the picture right Coner above. Make sure that you turn the knob up to
Max or a higher setting when using the resistor.

Custom Boundaries
* CUSTOMIZE THE ELECTRIC FENCE FOR DOGS TO SUIT YOUR YARD * Please NOTE cables should have gentle curves and NO right angles * Contact us for any advice you require on cable layouts * Our kit comes with Extra thick High Quality solid copper core Robust Polyolefin 20AWG wire (Outer core) compared to standard PVC type wire installs for above or below ground and on existing fences too * Customize the containment area to contain your dog or keep them out of areas you don’t want them to enter such as garden beds * Our Kit comes with 492FT (150m) drum. Expand your outdoor dog fence by adding more wire up to 10 Acres.


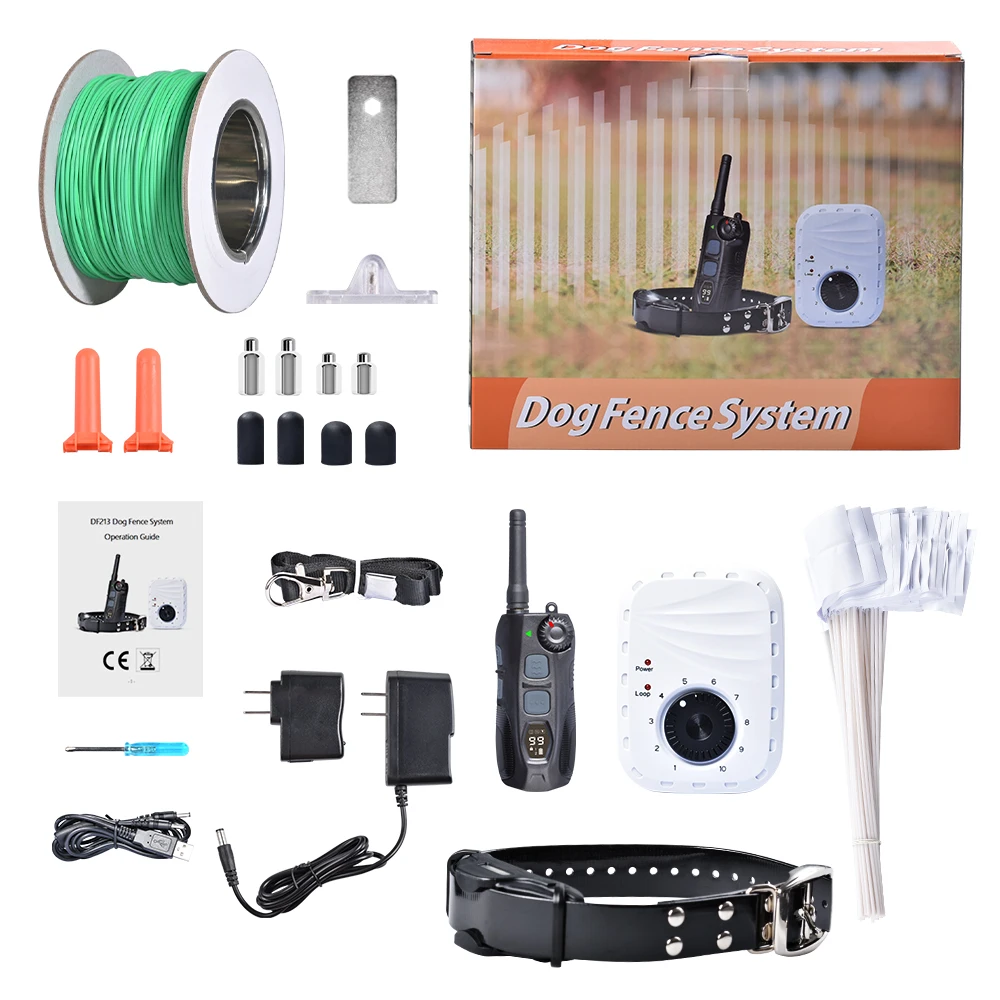
1*18V DC Adaptor for Fence transmitter
1*Remoter
1*Receive Collar
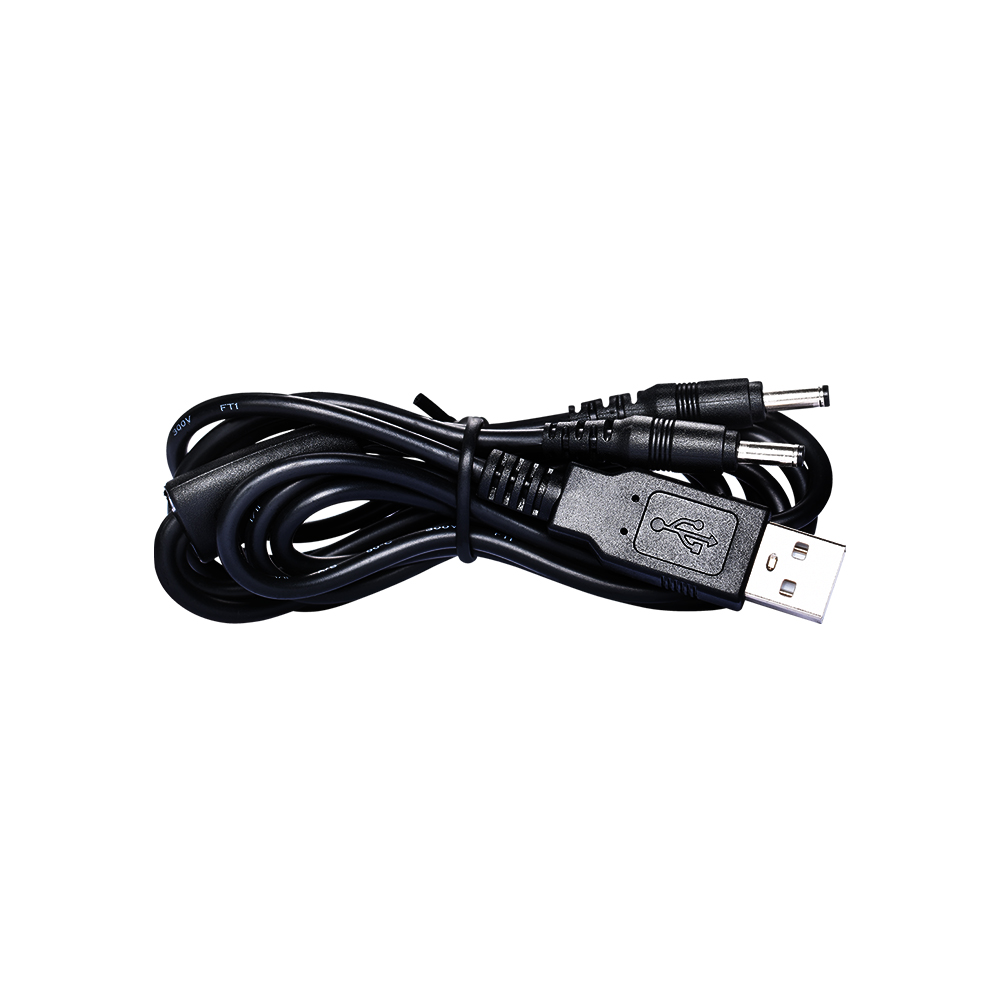
1*5V1000mA DC Adaptor
1*TPU Strap
1*Test Lighter
1*2 Pins USB Cable
1*Lanyard for Transmitter
1*Manual
2*Boundary Wire Connector
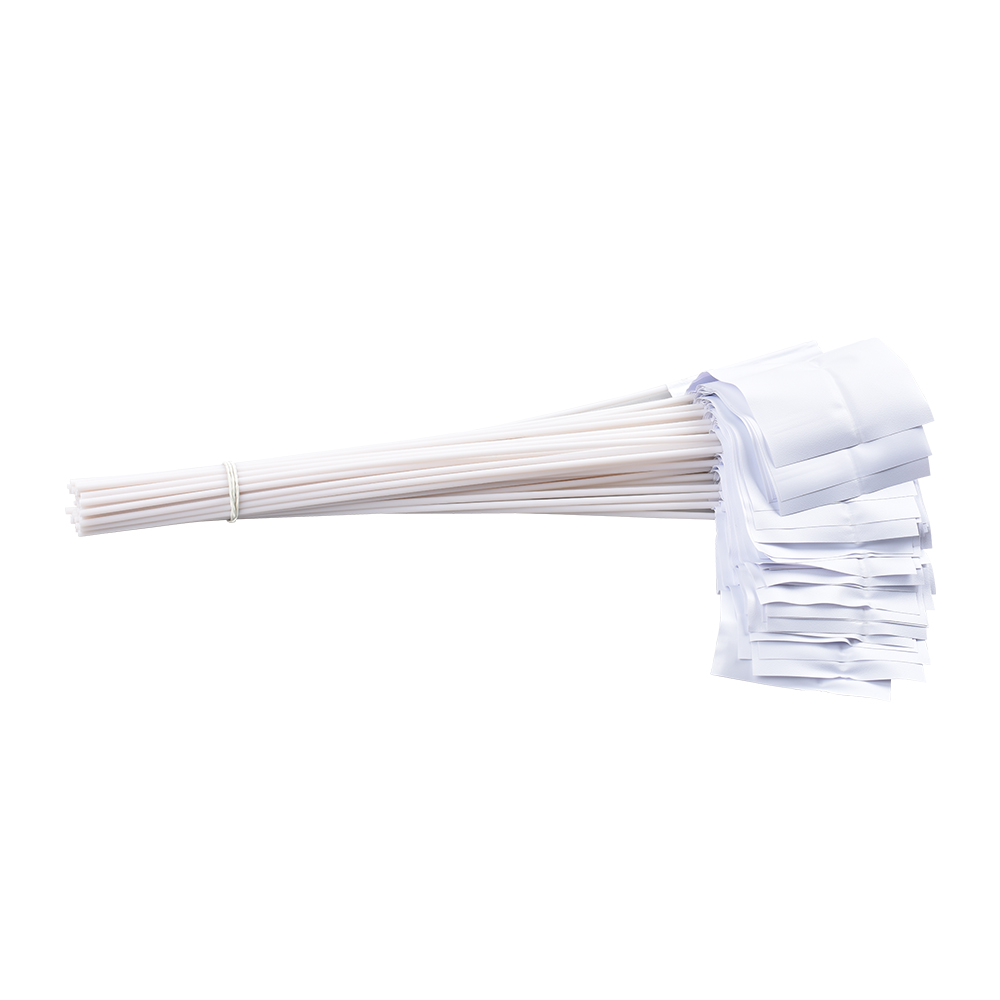
1*150m Boundary Wire AWG#20 50*Flag
2*Long Prongs
2*Short Prongs
4* Tubber Prongs
1*Screwdriver
1*Spanner for changing prong

STANDARD PACKING DETAILS
BOX SIZE: 34X33X7.2CMWEIGHT: 2.3KG/PCS
QTY/CTN: SIZE 37X62X37CM (8PCS)

Customized Service

CONTAINMENT TRAIN FENCE CUSTOMIZE
OEM SERVICE:
1. PACKING BOX CUSTOMIZE,
2. BRAND LOGO ON RECEIVER, COLLAR, FLAGS,
3. FENCE WIRE CUSTOMIZE,
MORE... ... AS REQUEST
OEM/ODM service
1.Professional R&D and design team
2.ID design
3.Function design, layout
4.Custom materials, processing
Main features
Multimedia
Dimensions
No reviews found